Configure Wi-Fi using an Android 5.0 [DELETE]
These instructions apply to all readers with firmware version 1.09 and greater. For older readers please use the advanced instructions.
These instructions are based on Android version 5.0 (Lollipop). If you are running an older version eg. 4.4 (KitKat) 4.1 (Jelly Bean), the steps will be slightly different but the concept is the same.
A Quick Summary
In these instructions, we will set the Android hotspot name and Wi-Fi password to:
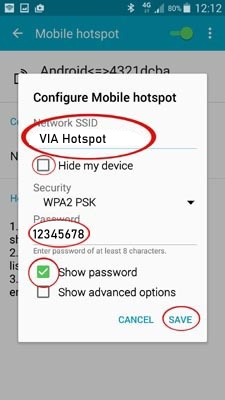
Hotspot name (SSID): VIA Hotspot
Wi-Fi Password: 12345678
Your reader will automatically recognise these network settings and upload.
Changing the phone hotspot name and Wi-Fi password
|
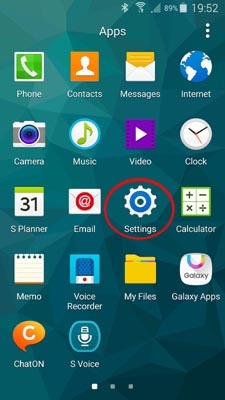
Step 1 |
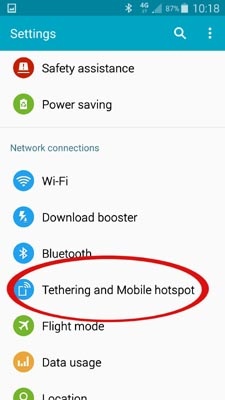
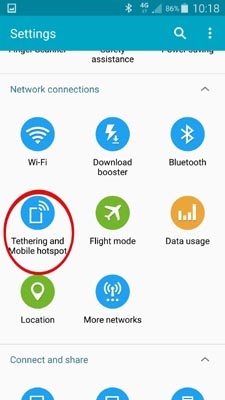
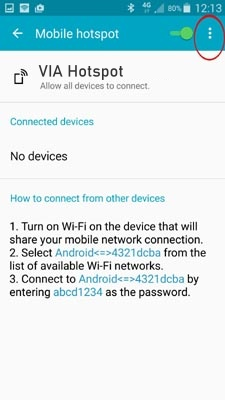
Step 2 Press: Tethering & portable hotspot |
|
 |
 |
 |
|
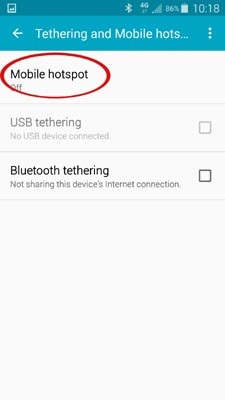
Step 3 |
Step 4 |
Step 5 |
 |
 |
 |
|
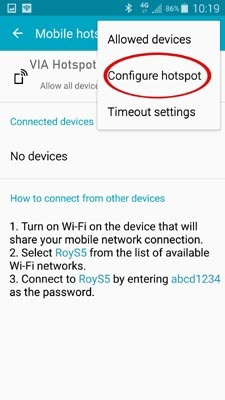
Step 6 Tick: Show password Type in Network name: "VIA Hotspot" Note, all these variations will work: viahotspot Type Password: 12345678 Press: Save |
Step 7 |
 |
 |
- Step 8: Plug the sensor into the Wi-Fi Reader
- Step 9: Press the Reset button on the bottom of the Wi-Fi Reader
- Step 10: Wait for the reader screen to display: Upload Complete. Your data is now uploaded!
- Step 11: You may unplug the sensor array.
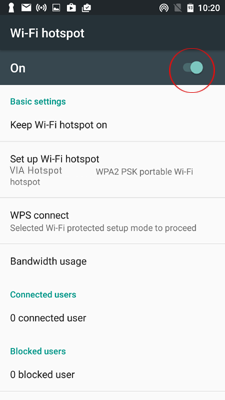
Future uploads
To upload data in the future, the Portable Hotspot must be
