Chameleon Wi-Fi System

The Wi-Fi System is our product designed for researchers, governments and development partners. This is because it brings to life one of our mottos: "From monitoring, to learning, to governance".

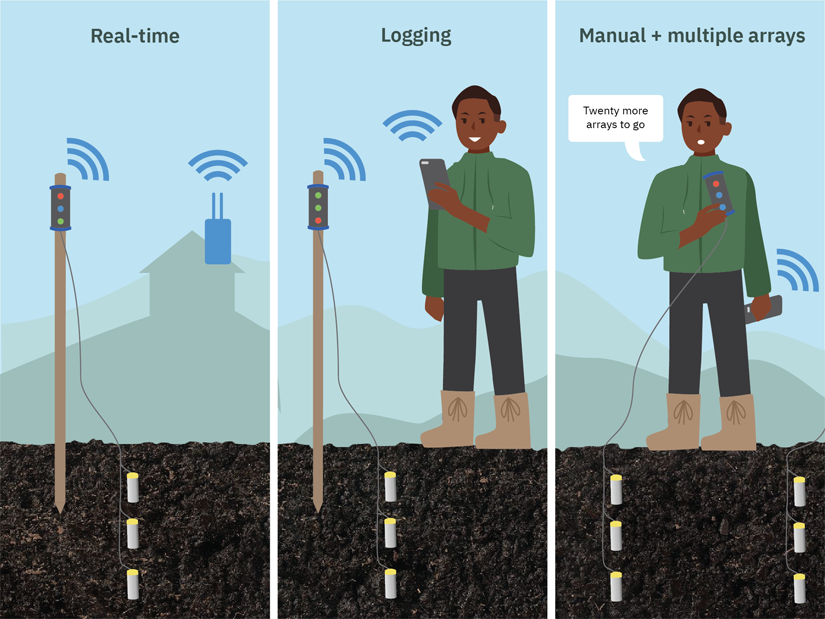
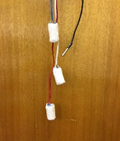
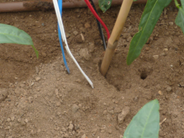
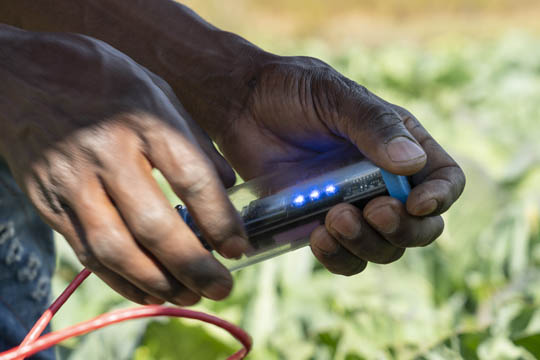
The Chameleon Wi-Fi System contains a Chameleon Wi-Fi Reader plus a three-sensor array on a plug with a temperature sensor and unique ID. The Reader displays colours, stores data and sends data to the VIA platform when there is access to Wi-Fi or a mobile phone hotspot.

Monitoring

The Wi-Fi Reader has three LED  coloured lights that shows the water status at three depths in the rootzone. Once a user understands the meaning of the three LED coloured lights, they can regularly monitor and then irrigate when needed.

Learning

The Wi-Fi Reader stores and sends data to the VIA platform to create a unique colour pattern for each crop. By comparing many patterns and their associated yields, it is possible to explore ways to save more water and get higher yields. Learning helps us to test our assumptions about when to water and strive for continual improvement.

Governance

Through data analytics on the VIA platform, we can track performance and manage conflicts over water. We can investigate equity in distribution by comparing patterns spatially on smallholder schemes. We can compare one scheme to another for water productivity, or track improvements over time.

Install

1. Install the sensor array

The sensors should be installed in a position that is representative of the irrigation block. This might be half-way down a row, but close enough to the edge to give easy access for taking readings or uploading data.

Three sensors should be installed in the same hole at different depths. A 50 mm diameter auger is ideal for creating the hole, since it creates the least soil disturbance.

Installation depths of 20, 40 and 60 cm will cover most situations. Shallower or deeper depths may be chosen depending on crop type, soil type and irrigation method.

Sensors can be left in place for several years or removed at the end of the season.

Install the sensor array

Select an auger, trowel or spade

The easiest method for installation is to use an auger that can go to at least 1 m depth. In the absence of an auger, the hole can be made using a trowel or spade.

The auger, on the left, is a 3 cm diameter screw type auger made from a wood drill bit that can be purchased from a hardware store. The auger on the right is a 5 cm diameter bucket type auger.

Digging your hole

When augering the hole, make sure the different soil layers are kept separate.

Sensors must be soaked in water before installation i.e. they must be installed when the lights are Blue on the reader.

Sensor depth lcoation

The Chameleon reads three depths. The depths must be in the following order:

  • Blue - Shallowest
  • White - Middle
  • Red - Deepest

The black cable connects to the temperature and ID sensor. It should be buried at the depth of the shallowest or middle sensor.

Alternate placement option

Sensors can be placed in individual holes, or multiple sensors can be placed in the same hole at different depths.

Carefully check the depth of each sensor when re-filling the hole.

Re-filling hole

Add soil layers back so that the same soil is back to its original depth.

The soil must be compacted after each handful is added back into the hole.

The hole must be compacted right to the soil surface to prevent any preferential movement of water towards the sensors.

2. Collect the first reading

As soon as the sensors are installed, collect the first reading:

  1. Connect the sensor array to the Reader and press the reset button on the bottom.
  2. All lights flash white twice signifying that the data has been stored on the Reader.
  3. The screen will display the Sensor ID, the resistance readings, the temperature and battery status and then search for an Wi-Fi Access Point.
  4. Write down the 4 digit Sensor ID. You will need this for the next step.

3. Pair the Wi-Fi and upload the first record

The Chameleon Wi-Fi Reader is pre-configured to look for a Wi-Fi Access Point with the following details:

Network name (SSID): VIA Hotspot
Wi-Fi Password: 12345678

Configure your phone hotspot as above and the Chameleon Wi-Fi Reader will connect to it.

If you do not want to change your current Wi-Fi or Hotspot SSID details, then you can train the reader to find your SSID and password using these Advanced Wi-Fi Pairing instructions.

4. Claim your Sensor Array

Claiming your sensor array starts the process of building the three layer soil water colour pattern each time data is uploaded from the Reader.

Sign in to https://via.farm/signin with your username and password.

Select “My Farms” from the My VIA menu and then select "Configure Farm" and then "Claim Sensor Array".

Enter the 4 digit Sensor ID.

Follow the wizard to assign a location of the sensor array (the name of the irrigation bay or field), the depths the sensors were installed, the crop type and the planting date (or start of irrigation season).

Use

Three ways to collect data

  1. Real time data collection
    The Reader is permanently connected to a sensor array. A Wi-Fi Access Point must be in range of the Reader. Data will be sent to the VIA platform every two hours.
  1. Logging
    The Reader is permanently connected to a sensor array but out of range or Wi-Fi. The data is logged every 2 hours and can be uploaded with a smartphone hotspot.
  1. One Reader + multiple arrayss
    >One Reader can measure any number of sensor arrays when a manual reading is required. Connect the Reader to the sensor array, press the reset button. The three LEDs will display for each sensor. The data will be displayed against the unique sensor ID and stored on the Reader.

Learn

All crops do not have the same sensitivity to water stress, but there are robust principles for interpreting the colours.

The blue LED means that the soil is wet. Irrigating when the LED is blue wastes water and leaches nutrients. There are some exceptions, such as plants in pots with restricted rootzones may need to be kept blue, as well as leafy vegetable on hot days.

The majority of the horticultural crops should be watered in the green zone. Be beware that the green zone does not last for long! A soil may have been blue for many days and then move from blue to red in just a day or two of hot weather.

Most horticultural crops will lose yield in the red zone. This is particularly the case for leafy crops or if the red colour coincides with flowering and fruit set of other crops.

Responding to the colours does depend on how deep the roots are compared to where the sensor is located. A fruit tree with a red sensor at 20 cm depth will likely be happy enough if there is water below.

Different crops have different sensitivity to water stress, and the irrigator must decide the optimal colour patterns. This requires some experimentation.

When the rootzone is completely wet the array will read blue at all depths or BBB.

As roots start to extract water, they will turn the top later Green to give GBB.

As roots continue to grow into the rootzone they will turn each layer to green, then to red e.g. RGB to RGG to RRG.

If there is no irrigation the rootzone will go all red or RRR.

The best combination depends on the type of crop and how frequently you have access to water.

Irrigating on BBB is a waste of water, time, energy and fertiliser. Waiting until RRR will likely cause yield loss. There are 25 other combinations of blue, green and red.

FAQ

Sensors are designed to operate at the following switch points:

  • Blue 0-22 kPa (wet soil)
  • Green 22 to 50 kPa (moist soil)
  • Red > 50 kPa (dry soil)

It is very difficult to make every sensor change exactly at those suction values, and for practical irrigation purposes, it is not necessary either.

Each sensor array is colour coded on the package after testing based on the blue to green switch point.

  • A yellow dot means the colour changed between 20 and 22 kPa
  • An orange dot means the colour changed between 18 and 20 kPa
  • A purple/pink dot means the colour changed between 22 and 24 kPa

The Sensor Array has three sensors connected to a plug. These should be placed at three depths in the soil, normally in the same hole. Typical depths are 20 cm (blue), 40 cm (white) and 60 cm (red). The temperature sensor should be placed at the same depth as the middle (white) sensor. For shallow-rooted vegetable crops, appropriate depths maybe 10, 20 and 40 cm. For deeper rooted crops and trees, installation depths maybe 30, 60 and 90 cm. These depths should be modified based on i) how frequently you irrigate and ii) how deep your soil is.

Although irrigation systems are designed to give a uniform distribution of water, there is always variability. For example, flood irrigated fields can be wetter at the end of the furrow than in the middle. Try to pick locations that are representative of a field. Multiple measuring points can be used to help achieve more uniform water delivery across an entire field.

It is worthwhile to do an irrigation uniformity test before installing sensors. Sensors located in dry or wet patches will not be representative of the entire field. This is particularly important for sprinklers. For drip irrigation, sensors should be placed half-way between the emitter and the edge of the wetting pattern. Locating the sensors directly under the drip emitter will shorten their lifespan.

Sensors should give accurate readings for two to four years, depending on soil conditions. The lifespan can be shorter in very wet or salty conditions and where sensors are placed at shallow depth directly under drip emitters.

The shallow sensor will be the first to degrade. If your sensor no longer turns blue after irrigation, it is time to replace it.

The sensors slowly degrade over time with products harmless in soil. If the sensor is broken, avoid breathing dust from the sensing material from the inner core.

The gypsum coating around the sensor buffers against changing salt levels in the soil. However, when salt levels exceed 4 dS/m or more, the calibrating shifts. Sensor will read blue for a longer period (when they should have turned green). In other words, high salt levels cause the colour changes at greater suctions.

The grey colour indicates the sensor is disconnected or very dry.

When a sensor cable is disconnected (open circuit) the reader sees it as a very high resistance. On the Visualisation, anything about 4000 kOhms is assumed to be an open circuit and is colour grey to alert you to the fault.

Sometimes the soil gets so dry (end of the red zone) that it goes beyond the accuracy of our Chameleon reader. this also shows up as grey on the visualisation and the colour will return when the soil is wetted again.

The sensors are dry when packaged for shipment and too dry for the reader to detect them. Before use, soak sensors in water until they turn blue.

The pink colour indicates the sensor has detected high salt levels.

When a sensor reads a resistance <0.5 kOhms, is has detected salinity levels over 4 dS/m. The sensors will switch to blue, then green and red as the soil dries. However, the colour switch points will occurs had greater suctions than the calibration and are therefore not a reliable indicator of when to irrigate.

Option 1:  App - Google Maps

  1. While you have Internet access run Google Maps, menu, Offline Maps, follow the on-screen instructions to download the maps for where you will be going that has no Internet access.
  2. Later, with no Intenet coverage, run Google Maps
  3. Wait for your phone to find the satellites (this may around take 5 minutes). You will know when it is ready when your map position changes to your current location.
  4. To find your geolocation, hold your finger on your current location and the coordinates will display in degrees, minutes and seconds.
  5. Click 'More info" and the coordinates will display in decimal (The decimal format is needed for entry into via.farm).
  6. Record the coordinates or click 'Share places' and message or email them to yourself.

Option 2:  App - My GPS Coordinates

  1. While you have Internet access, install the free App "My GPS Coordinates" from the Google Play store or Apple App store.
  2. Later, with no Intenet coverage run "My GPS Coordinates"
  3. Wait for the GPS satellites to be found.
  4. Record your decimal coordinates displayed.